HOW TO MAKE YOUR OWN WINDMILL
Below are a number of pictures showing some of the steps along the way to make a simple windmill.
Step 1: From a sheet of 4mm thick plywood cut-up eight (maybe ten just to make sure you have some spares) sails roughly 5cm x 30cm. Be carefull of splinters. If the windmill is going to be outside for long you might like to varnish the sails.
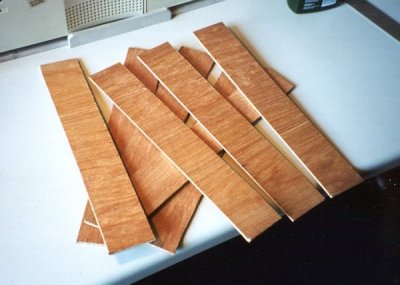
The sails cut from a sheet of plywood
Step 2: Cut-out a circle of wood about 15cm diameter and 1.5cm thick. With a pencil draw a line across the circle through the middle to divide it in two. Draw another line at right angles to this to divide the circle into four. Continue doing this until the circle is divide up into 8 equal sections. Drill a small 4mm hole in the exact centre of the circle (Note: try your best to make sure this is perpendicular to the face of the circle, otherwise the windmill will wobble when it goes round).
Where the 8 lines finish, at the circumference of the circle, draw a line across the width of the disc so that the pencil lines are just visible on the other face of the circle when you turn the disc over. Turn the circle over onto the side not yet drawn on. Make a mark 1.5 cm to the right of every one of the 8 'just visible' marks made from the other side. Now join up every opposite pair of these these new marks. The result should be another eight subdivisions of the disc but squew (off-set) from the other side. Use a pencil to mark, on the width of the circular disc, lines joining up the two sets of 8 lines. Finally, to complete the marking-up, draw another line parallel to this slanting line with a gap just a little larger than the width of the sails, in this case about 5mm.
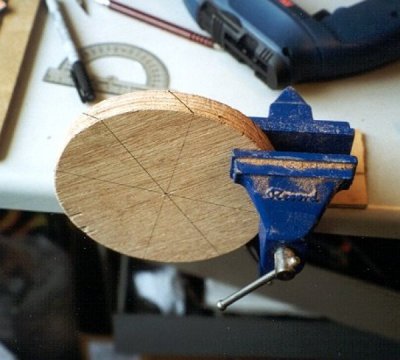
The circular disc and pencil markings before sawing.
Step 3:
Now using a saw carefully cut along both slanting lines to a depth of about 2.5cm. Try to make this the same all the way round. Using a screwdriver, or chisel, very carefully knock out the small piece of wood left between the saw cuts.
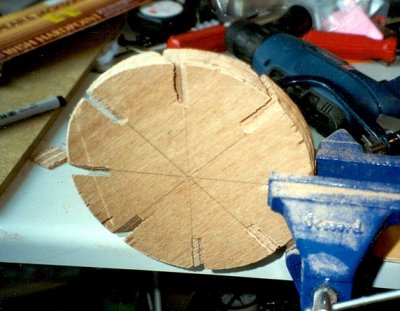
The circular disc after cutting and removal of wood.
Step 4: One by one, fit each of the sails into the cut-out groves and secure using woodglue. Use a small nail or self tapping screw to fix in place. This can be attached through the sail and into the width of the circular disc. Varnish the whole thing if you like.
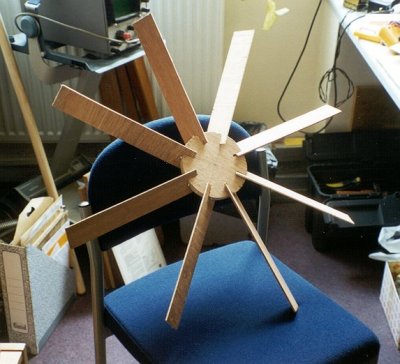
The sails in place on the circular disc.
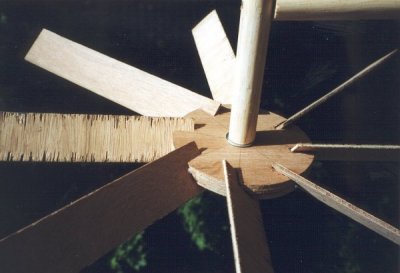
Close-up of sails in place on the circular disc.
Step 5: Cut off a piece of broom pole about 40cm long, this will be the windmill 'boom'. Make sure one of the ends is cut-off straight. To the other end fix with nails or self tapping screws a simple tail made out of a 15cm x 15cm piece of 4mm plywood. Find a long thin wood screw (about 5cm long and 3 mm diameter). Thread on a large washer (3 mm hole with say 3cm diameter) then the circular disc, then another washer (a piece of metal tubing put in the circular disc hole will help to free up the rotation and stop it wearing out too quickly). Screw in to the free end of the broom pole, but not too tight that it stops the mill from rotating freely. The windmill now has its tail, sails and boom. Finally find the centre of weight by balancing the windmill on a finger along the length of the boom. When the balence has been found, drill a 4mm hole through the boom and lightly screw this to another piece of broom pole (so that it can easily move but does not fall off) which can be driven into the ground. Varnish the rest of the windmill.
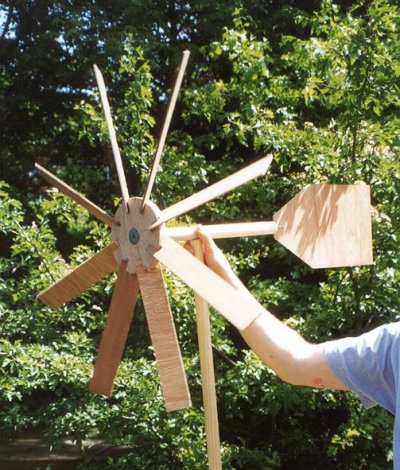
The completed model windmill.
The wind will now hit the tail which will pivot the windmill into the wind. The wind catches the sails and turns the windmill. This little mill will turn in the slightest breeze. It could be the basis of a much larger mill as we made on Capriaia in the Rough Science series.
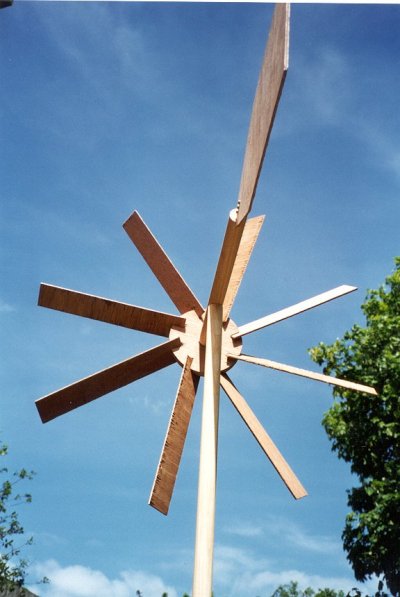
Another view of the completed model windmill.
* click here to see the windmill made on the
Rough Science TV series
* Click here to view a Santorini windmill
Dr Jonathan Hare, E-mail: jphcreativescience@gmail.com
NOTE: Although none of the experiments shown in this site represent a great hazard, neither the Creative Science Centre,
Jonathan Hare nor The University of Sussex can take responsiblity for your own experiments based on these web pages.
THE CREATIVE SCIENCE CENTRE
home | diary | whats on | CSC summary | latest news