MESHTASTIC
EXPERIMENTS PAGE

(Thank you to Simon G4EYR for all the technical information, any mistakes are mine!)
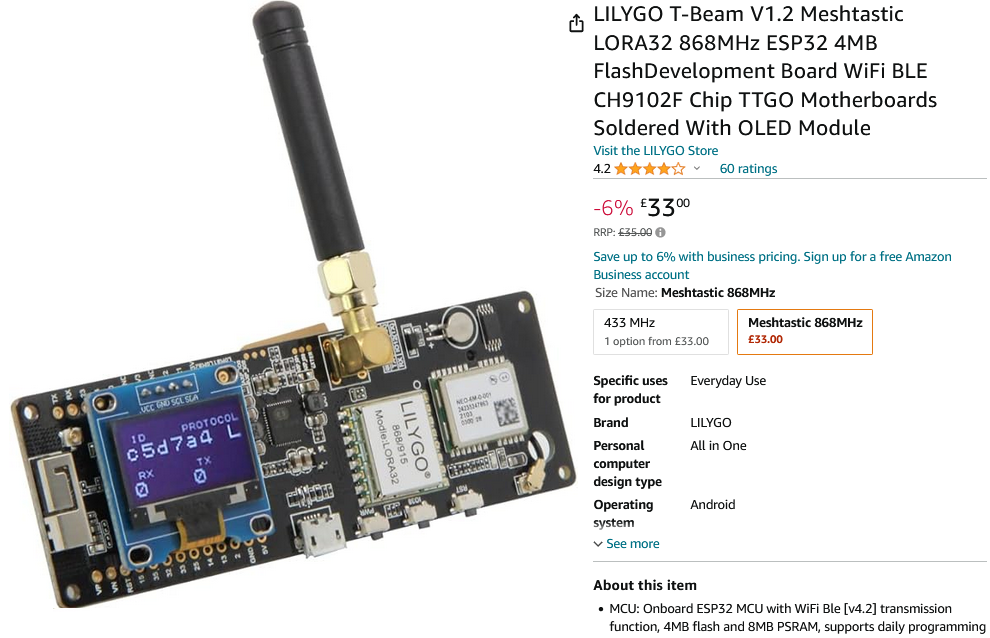
Meshtastic dev pcb

Meshtastic is a licence free system (so you don't need to be a radio amateur for example) that creates a local network for simple text like communication and for the 'Internet of Things'.
It will work on its own without the internet.

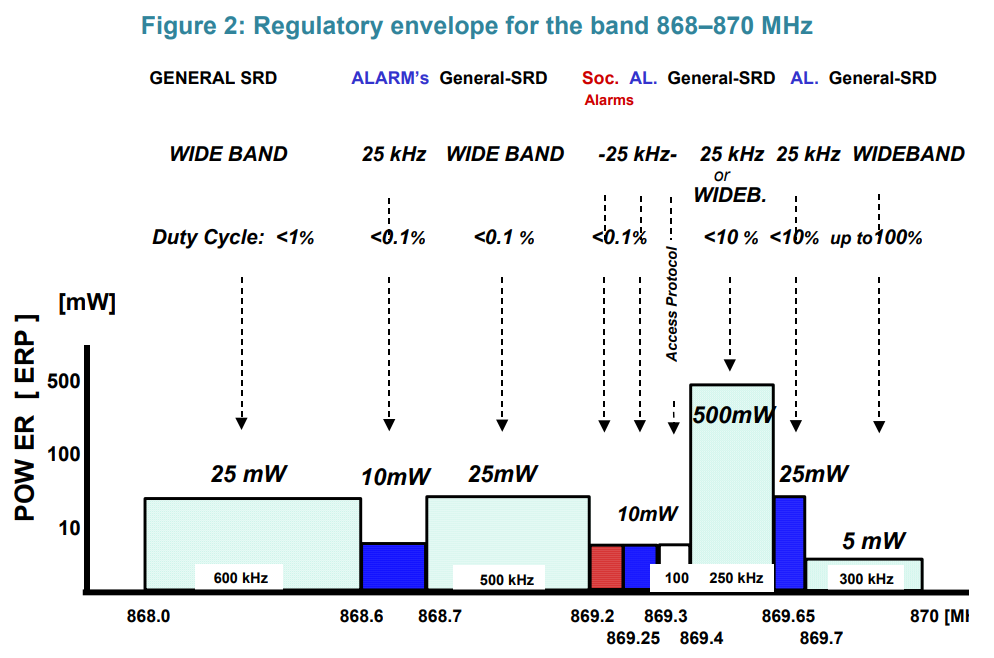
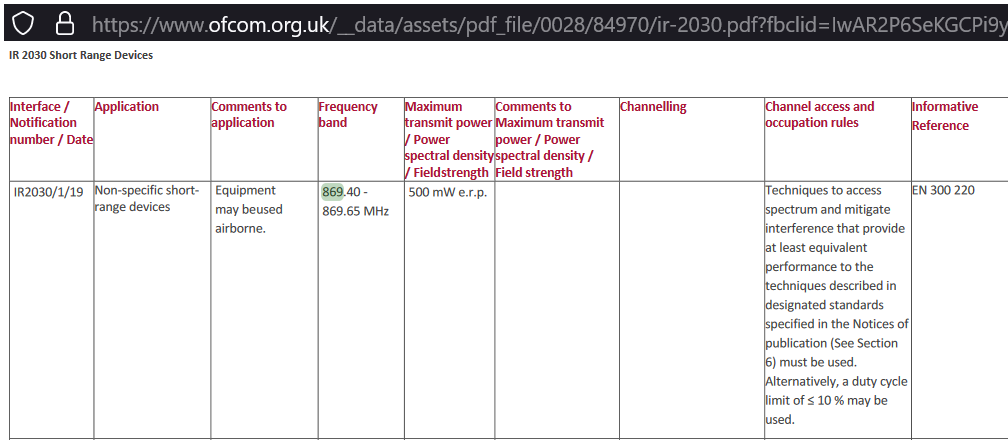
The UK network is on UHF, around 869.400 to 869.650 MHz. It is a low power (ca. 500 mW's) spread spectrum technique that copes with noise very well.
Once you got a system working you can use a serial connection to a web browser-based program or Bluetooth to a Meshtastic phone App to use it (see below).

Why would you want to have a network ?
* a sort of local 'club' of interested enthusiasts
* useful in emergency situations like earthquake zones etc.
* large trecking outdoor groups where there is no mobile phone reception
* large outdoor events where the mobile network struggles
* at sea or in forests
* on large farms
* Moon or Mars bases etc. ??!


Amazon / ebay are selling readymade development boards (ca. £35) that have all the hardware you need including GPS and UHF antenna etc.

The data is sent using a chirp technique and is part of the LoRa system. It sends data by sliding the frequency (a chirp) and interrupting the ramp momentarily at a particular place in the ramp corresponding to the symbol you want to send. This would be quite slow / difficult to analyse but the clever thing is that by multiplying the received signal with the same frequency ramp, but going the opposite direction, it creates a spectrum that can be sorted using a standard FFT algorithm. There is a interesting video about the theory here:

LoRa theory video

Tech Stuff

Pcb development board
For Meshtastic, all you need is a Heltec v3 868MHz LoRa module. They usually come with a small rudimentary antenna. Sometimes you get a IPX to SMA pigtail included with them. There are several similar looking boards which are not the right ones. It is also good to have a LiPO battery as well. The board has battery management with charging via the USB-C socket.

Make sure to get the correct frequency range! You need to ensure the board has the following:

SX1262 LoRa node chip
CP2102 USB to serial chip
ESP32-S3FN8 (Xtensa® 32-bit lx7 dual-core processor)

There are older version boards with lower rx sensitivity and tx power.
There are also other suitable boards from LilyGo and RAK which use the NRF52 chip

Warning: Avoid -R (RUI3) model
the Heltec v2 is not stable enough to run the current Meshtastic software.

How to set up a Meshtastic node for first use
Connect an antenna or some form of dummy load to protect the transmitter output from damage.

The firmware on the board needs to be erased and replaced.
Before you do this Install the USB to serial UART driver if you don't already have it for CP210x chip from: https://www.silabs.com/.../usb-to-uart-bridge-vcp-drivers... For Windows you need the "CP210x Universal Windows Driver". Unzip it, then right click on silabser.inf and choose "install". Plug a USB data (not charging only) cable from the board to the computer, then using a Chrome-based browser (e.g. Edge or Chrome) go to this URL:

meshtastic site

You can then choose the device which you have and the firmware you want to use – e.g. alpha 2.24 at the time of writing. This seems completely stable and has all the latest features and improvements in it. Leave the baud rate at the default 115200 and switch on "Full erase and install". When the flash is finished (can take several minutes) the board reboots. Leave the USB connected and configure using the following app which also runs in the web browser:

meshtastic client

Click + New Connection and then Serial and then New Device. Choose the Com Port in the pop-up window then OK. The control panel for the node then appears in the browser. Set a long and short name in the top Lefthand corner. Press the Save button.

Unfortunately, this and every other setting you change (by pressing Config and selecting either Radio or Module on the Lefthand side at the bottom) must be confirmed with a click (often in top Righthand corner) and this causes the board to reboot.

You may have to close the browser tab if "not responding" and reconnect the app after the device has rebooted. Try to make changes in batches and Save when finished. Radio Config and Module Config need separate batches. Here are the important settings which need changing after a fresh install of firmware:

Under Lora tab:
Region: EU_868
Ignore MQTT: ON
Bluetooth tab: Fixed PIN (saves having to climb the mast and look at the PIN number shown on the display!)
Range Test: Enable. Leave it at 0 to avoid spamming the mesh.
Neighbour Info: Enable


The web browser app can be used to do most things with the device although the phone app via Bluetooth is nicer.

If you click on Peers you will see a list of nodes within radio range. You click on Messages which puts you in the Primary Channel (which is called LongFast on the phone app). This is a shared chat group for all users within range rather like a Whatsapp group. If your node has found peers then you can send direct messages to these (listed at bottom Lefthand corner). The node needs a power source which can be a 3.7V battery which can be charged via the USB port. I run a USB cable outdoors to my node so that I can change settings/upgrade firmware and leave the battery on trickle charge.

Smart Phone use
Install the Meshtastic app on a smartphone. Turn on Bluetooth and select the name of your node and "connect". Start the App and go to settings (top of screen far right end cogwheel in a square). Click the large + button in the bottom righthand corner and select the Bluetooth name of your node. Wait a few seconds for it to connect. You will see the app loading modules. After that you can use it.

On the Bluetooth app on the phone, you a select a peer and click "Traceroute". This shows the hops and afterwards you can see not only SNR but also RSSI which unfortunately is not an absolute signal level and varies for different hardware. Probably SNR is a more relevant indication of path performance between devices.

Extra Notes:
You can also do a lot more with the board via Python.

Some tech. details from the Ofcom web site:
Ofcom data 1
Ofcom data 2


back to PIC page Radio page x-files page Main page


NOTE: Although none of the experiments shown in this site represent a great hazard, neither the Creative Science Centre,
Jonathan Hare nor The University of Sussex can take responsiblity for your own experiments based on these web pages.


THE CREATIVE SCIENCE CENTRE


home | diary | whats on | CSC summary | latest news