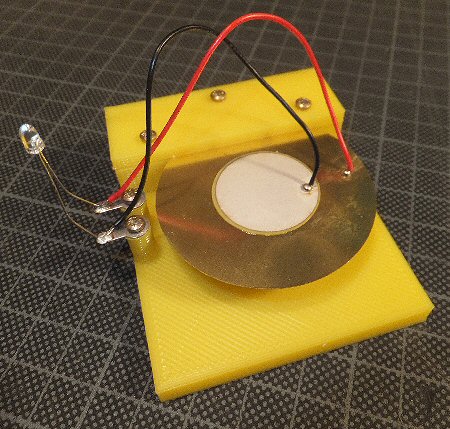
Simple piezo-electric demonstration
Dr Jonathan Hare, The Creative Science Centre, University of Sussex


simple piezo demo unit

You can make this piezo-electricity demo without using 3D printer parts just by soldering an LED to a piezo transducer. When you flex the transducer it creates a voltage across the piezoelectric crystal and the LED briefly lights (see article in the links below for more details). However the solder joint can easily come away from the silver pad (on the top of the transducer) and as people are often a bit heavy handed with the relatively delicate piezo crystal it can easily get damaged. Shown here is a very simple 3D printed holder that is used to secure the piezo transducer and overcome these problems. The transducer is secured using three screws and a fixing plate a few mm above the base. This means you can press the transducer and flick it a bit but not so much that you can damage it. In fact if you pick up the unit and drop it from only a few cm height the small shock will also create enough voltage to flash the LED. As we use thin wires to go to the LED (which is secured using two posts on the base) there is far less strain on the electrical connections. Ideally you should remove the plastic coated wires that come with the transducer, and replace them with very fine enamelled copper wire (e.g. 40 SWG or thinner).


original piezo
article
3D .stl file
3D .g file
3D .scad file
more
soon
more
soon
more
soon
back to
3D page


THE CREATIVE SCIENCE CENTRE


Dr Jonathan Hare University of Sussex, Brighton.
e-mail: j.p.hare@sussex.ac.uk

home | diary | whats on | CSC summary | latest news